To access student management, go to account and select “Student Manager”. Beforehand ensure that you are logged into your teacher account; if you do not already have a teacher account refer to the Accounts section.
Class Editor
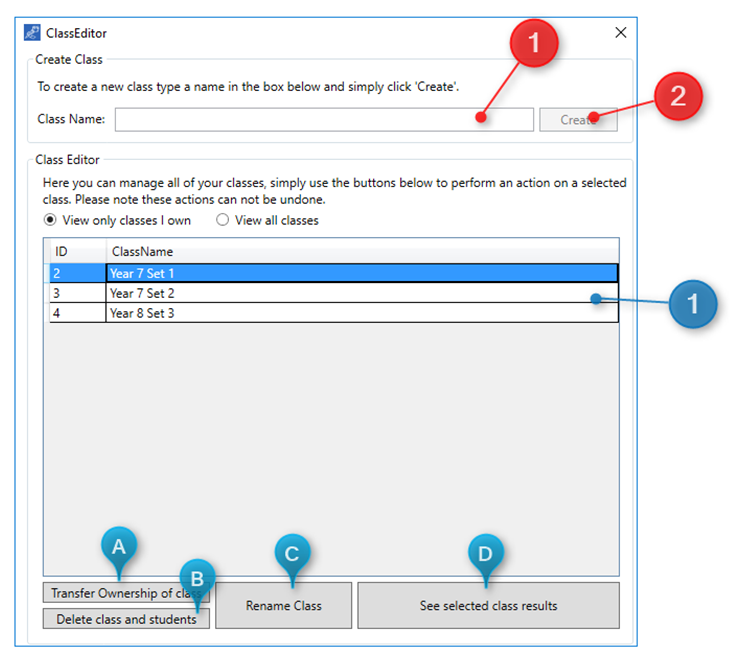
Upon entering student management, the first window will be the “Class Editor” as shown above. Here you can create new classes, view your classes, and perform a variety of actions on them using the buttons below.
Creating A Class
To create a new class simply:
- Enter the name of the new class in the textbox.
- Press the “Create” button, a message box window should confirm class creation.
Class Managment
To perform an action on a class you must first select it from the data grid (1). Once selected there are a variety of actions you can perform:
- Transfer Ownership of class: This will allow you to give a different teacher control over a class. To do so simply select a class, press the button, and then select a new teacher from the drop-down menu.
- Delete class and students: This will allow you to delete the class and all of the student accounts and their results inside of your class. This action cannot be undone and any students you wish to maintain should be transferred before deleting the class.
- Rename class: This will allow you to simply rename a class, to do so simply select the class, press the button and type in a new valid name.
- See selected class results: This will open a new window called the “Class Viewer” which is detailed below.
Class Viewer
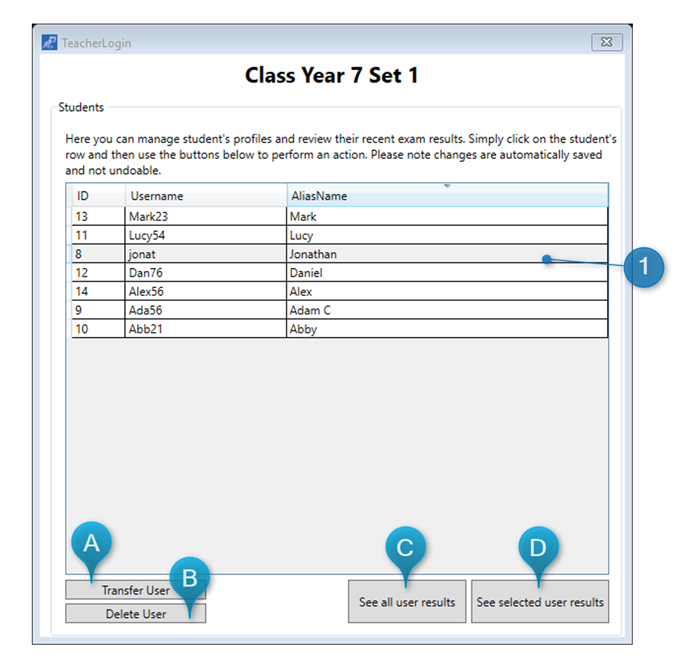
The class viewer window will display a data grid of every student inside of the selected class from the “Class Editor”. Once again you can perform an action on a specific student by selecting them and then using the buttons below to perform an action:
- Transfer User: This will allow you to transfer an individual User from one class to another, simply click on the User, press the button and then select a new teacher and a new class.
- Delete User: This will allow you to delete a student’s account including all their exam results. Students can delete their own account themselves by navigating to Settings and then details. Students can remake a new account at any time.
- See all User results: This will open an exam results viewer for the entire class, see below for more information.
- See selected User results: This will open an exam results viewer for an individual student, to do so click on a specific student and then press the button. See below for more information.
Exam Result Viewer
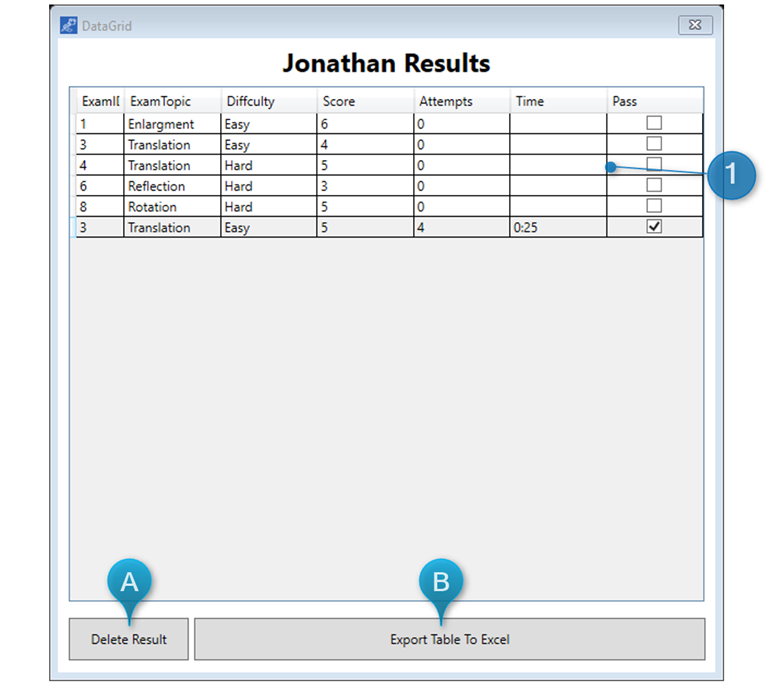
The exam results viewer will display an individual’s or class’s results in a data grid. Here you can view the exam topic, exam difficulty, total score, total attempts, time spent and if they passed or failed the exam. These results can be ordered by selecting one of the headings along the top. Like the other windows you may perform an action on the data by selecting it and then using the buttons below
- Delete Results: The delete results button allows a teacher to remove an individual’s exam results in the event that a student accidently submitted and erroneous exam results. This feature is not available to students. To use it simply select the erroneous exam result and press the button.
- Export Table To Excel: This will allow you to export the results from the data grid into a .csv file, a file format accessible by Microsoft Excel®. To use this feature, simply press the button and then select a save location, name and press save. Once saved a file similar to the one on the right should be produced.