Installation
As previously stated, the recommend way of downloading and installing the program is through the Microsoft store just simply click the install button and let Windows do the work. If you are not running Windows 10 and do not have access to the Microsoft Store you can download the installer for older versions of the software in the past releases page on GitHub. If you want to run a new version of the program you will need to build your own executable from the source files. The recommend way of doing this would be by using Visual Studios; but those steps will not be documented in this guide. If you are a school with multiple users and wish to take advantage of the database, you will need to host the database file which can be found in the GitHub Releases page linked below.
Settings
Once the application has successfully installed you may wish to edit the default application settings. To do so, navigate to the top left corner of the screen and click “File”, then select “Settings”. You can also press the “F1” key to open the settings panel.
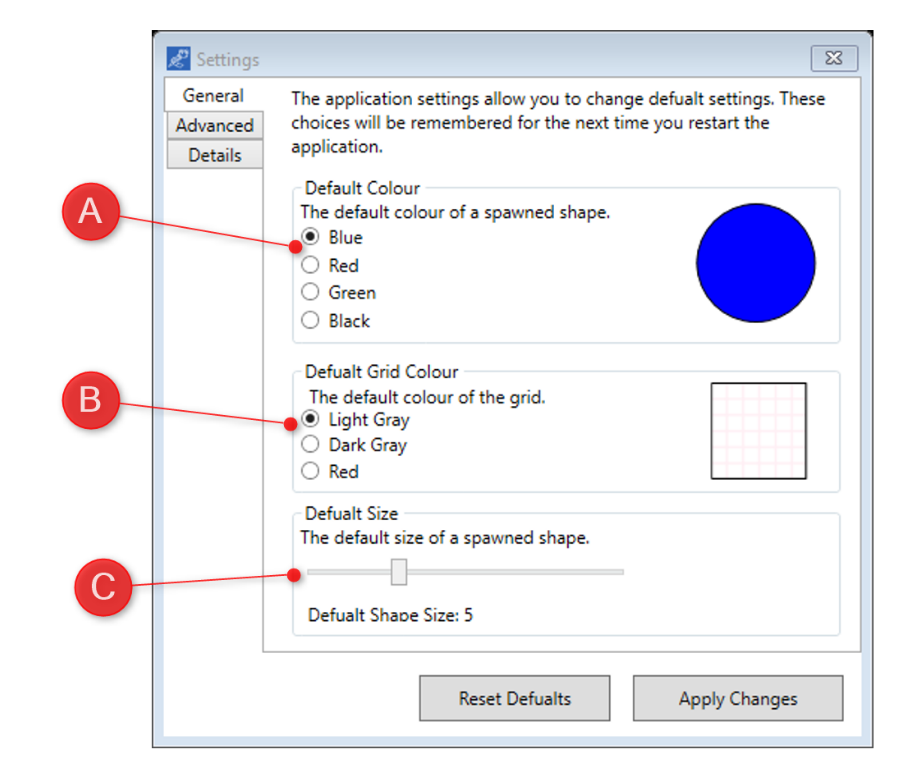
The settings window should then appear, these choices will be remembered by the program for the next time you launch it and saved in a .config file. Which can be copied and deployed to other Users if needed.
- Default Colour: This will allow you to change the colour of a spawned shape from blue, red, green, or black.
- Default Grid Colour: This allows you to change the grid colour to either: Light Grey, Dark Grey or Red. Some of the colour schemes have been designed with projectors in mind (for use in class rooms) and might light peculiar on a computer screen.
- Default Size: This allows you to change the default size of a shape spawned, ranging from 1 to 15 blocks wide and high.
To save your settings simply click “Apply Changes” and the application will restart itself using your new saved settings. If any problems arise you can click “Reset to defaults” which will set all the settings back to their original values.
Advanced Settings
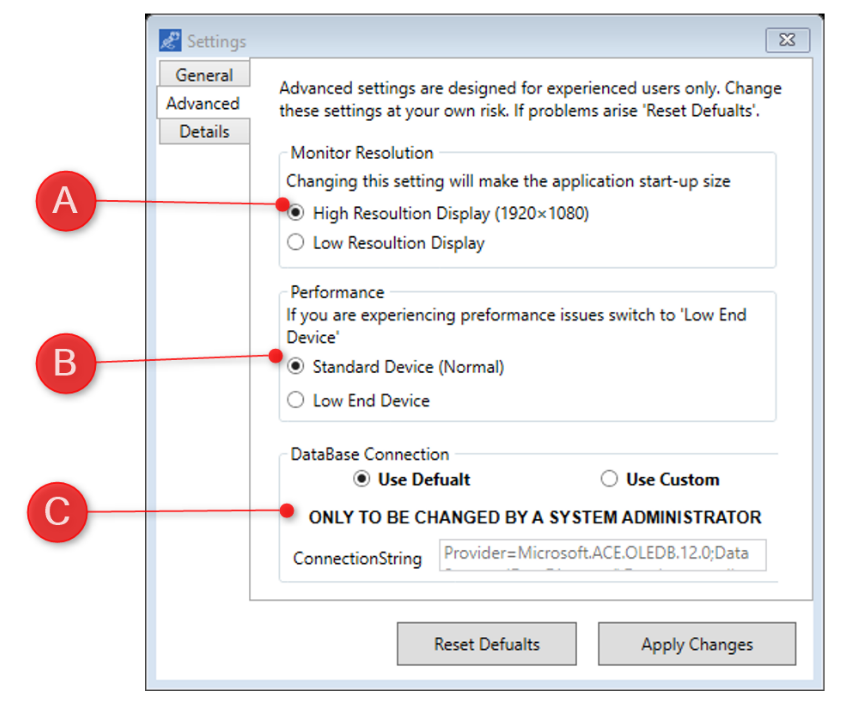
Advanced settings are intended to be managed by a system administrator, they provide a range of settings designed to alter Transformations™ to different PC environments.
- Monitor Results: Allows you to specify the resolution of your current monitor. If you have a HD monitor or higher, select “High Resolution Display”, otherwise select Low Resolution. This setting will change the default start-up size of the window.
- Performance: Allows you to specify the device’s power. If you select “Low End Device” the program will turn off: transparency, glow, shadows, reduce the target framerate to 30FPS and reduce the maximum size of the grid. This should decrease start-up times and make the application run smoother on lower end computers.
- Database Connection: Allows you to change the location of the database to which you wish to connect; a detailed outline is described below;
Once again to save these setting press the “Apply Changes” button located at the bottom right of the window. If any problems arise “Reset Defaults” will also rest the advanced settings.
Database Configuration
By default, the application will search for a locally saved database on the User’s device in the same location as the program was open from. If you have used the installer, this will most likely be from the programs folder, which is a read only folder and prevent some functionality from working properly. Moreover, this will inhibit the ability for teachers to see individual’s exam results and manage a class. As such to ensure all the application features function, you should redirect the database location to a network location. It is imperative that all Users have both read and write access to this location. Due to User results needing to be both read and written to the database.

To set a new database connection string, select “Use Custom” radio button and then insert your new database connection string in the textbox. When you click “Apply Changes” the application will test this connection. If a connection cannot be established the settings window will not save and close.
A database connection string should be given in the format:
Provider=Microsoft.ACE.OLEDB.12.0;Data Source=|DataDirectory|\Database.accdb
Where the section enclosed by the vertical dividers is replaced with the new directory. For example:
Provider=Microsoft.ACE.OLEDB.12.0;Data Source= C:\Users\Public\Database.accdb
Please check that you have the correct version of the database for the version of the program you are running.
If you are experiencing any issues with configuring the database please refer to the trouble shooting section of the User manual.
Langauge Settings
By default, the application will search for your system/computers regional language, if it can find a supported langauge it will choose it on first time start up. If the program fails to automatically switch to your local language or you wish to use a language different to your computers main language you can nagivate to the 'Languages' tab and select the appropriate language in the drop down menu and click save.
							:     Note

							Please note, this feature was added in V1.6, it can not be accessed in earilier versions.